MaterialsThis past week I gathered all the supplies I would need to create my painting. I went to Michaels to purchase all my materials. I was surprised to see that many items were sold out. Despite this, I got all that I needed. Bob Ross uses oil paints in his artwork. The oil paint colors I got are titanium white, lamp black, van dyck brown, violet, oxide of chromium, phthalo blue, brilliant red, orange, and medium yellow. When painting with oil paints you have to use specific brushes that can be used in oil paint. I did not realize this until after I started picking out my items. I decided to get a two inch brush, fan brushes, liner brushes, and detail brushes. These are all brushes Ross uses in his tutorials. Bob Ross also uses palette knives in his artwork so I got an assortment of those. Although Bob uses an 18x24 inch canvas, I purchased 12x16 inch canvases. I decided that I would scale down his paintings to hopefully save time and money. Along with these items I purchased a bucket to put my materials in, a palette, linseed oil, and brush cleaner.  Doing it like BobOne of Bob's most famous techniques is that he uses an oil on oil painting method. In order to achieve this method you have to spread a thin layer of liquid white across the canvas. The Bob Ross company sells liquid white for around 15 dollars. In order to save money and to not get scammed by buying liquid white cheaper on a sketchy website, I decided to make my own. After researching different ways of making liquid white, I found that mixing titanium white and linseed oil was the easiest way. I mixed equal amounts of linseed oil and titanium white until I got a thin paint substance. This ended up working out perfectly. PreparationAfter doing research on Bob Ross' different tutorials, I found one that was perfect. Bob Ross did a special one hour episode for The Joy of Painting that was meant for beginners. This painting was titled "The Grandeur of Summer". During this one hour special Bob goes in depth about all of the techniques and tricks he uses. After I chose what tutorial I wanted to follow, I set up my workspace. I decided that the best place for me to work would be on my back indoor patio. This gave me a quiet space with good lighting to paint.  The processI set up my tablet, pulled up Bob's tutorial, and got to work. First I applied my DIY liquid white. After applying the coat of liquid white, I went right into making the sky and water. After doing that I painted the clouds in the sky. Then, I painted the mountains and added details to them. After that, I started on the foothills. I continued to make foothills while also adding reflections to the water. The next step was adding lots of bushes and happy little trees. Finally, I added details, highlights, and pops of color. This whole process took me two and a half hours. The most challenging part of this painting was making the mountains. To make these I had to use the pallete knife. It was very difficult to get the technique Bob used right. I had trouble creating details and depth with the knife. Another thing that challenged me was the mental aspect of this. I had to keep reminding myself that mine was not going to be as perfect as Bobs. The process of painting was just as hard as I thought it was going to be. It took lots of time to add details and get colors exactly how I wanted. Although some parts were tedious, following along with Bob was actually quite easy. The tutorial was simple to follow. I did have to pause and rewind hundreds of times though. Below is the video tutorial of Bob Ross' "The Grandeur of Summer" The outcomeHonestly, I am pretty proud of myself. Although mine does not look exactly like Bob's, I think it is good. I am looking forward to painting my next landscape and further increasing my skills. Next week, I will find another painting to create and compare my skill level to this week. I had a lot of fun painting like Bob Ross. Below is my recreation of "The Grandeur of Summer" by Bob Ross. 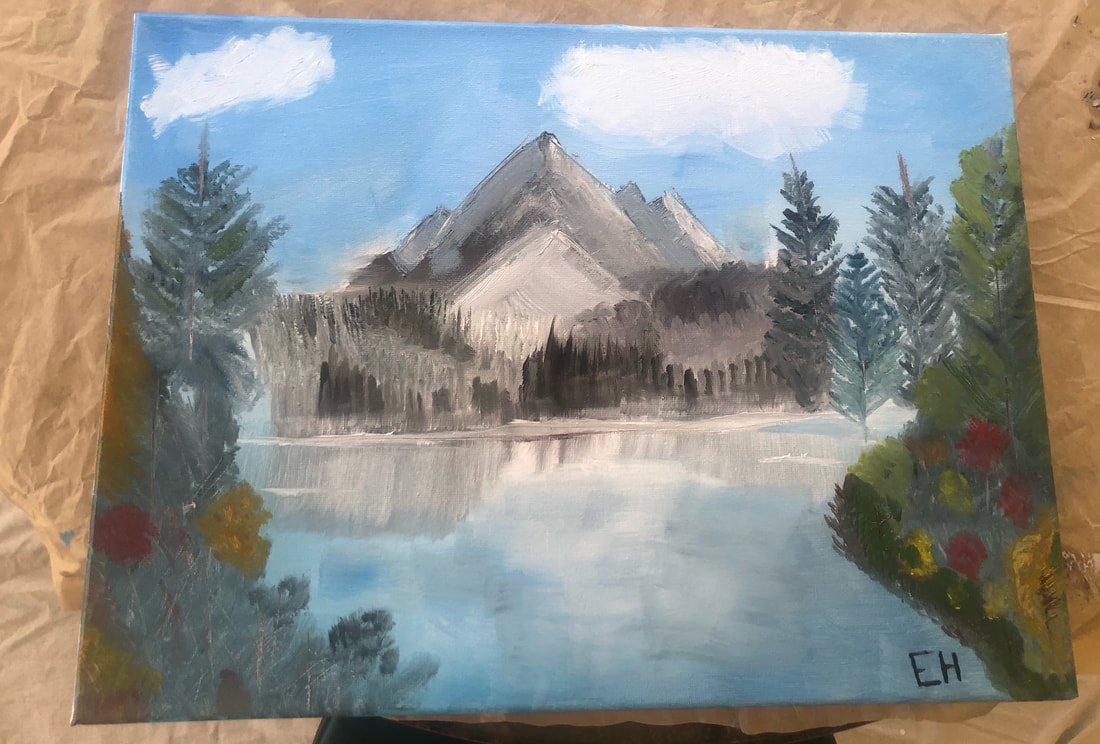
0 Comments
About the project I have always loved art and drawing. However, I have always just done it for fun and haven't really put too much effort into it. So, for this project I am going to challenge myself to get better at a new skill, painting. Over the next twelve weeks I am going to follow video tutorials produced by artist Bob Ross. I will start with easier tutorials on the first couple of paintings and then progress with difficulty as the weeks go on. I will be following along with his steps and trying my best to recreate his paintings. This project will hopefully make me a better artist while also giving me a fun and relaxing hobby to do. Why Bob Ross?You can't tell me Bob Ross wasn't a cool dude. He has a very laid back and kind personality. Many know him from his soothing voice and famous quotes. Bob had the ability to produce hundreds of beautiful pieces that were each unique and used his own special techniques. Bob Ross is an inspiration to me and figuring out his talent is intriguing. My brother has also always been a fan of Ross. In fact, that is where I first heard of him. Ever since, I have loved watching him paint and browsing through his artwork. Set upThis week I took time to set up my website. While this was tricky to learn at first, I think I got the hang of it. This is my first time making a website so the experience is new to me. This week, I also tried to gather some of my materials. Next week's blog post will be about the different materials I purchased and the experiences I had. I will also start recreating my first Bob Ross painting next week. Maybe I will make some happy little accidents.
|
AuthorHello, my name is Emma Hayes and I am a sophomore at Davie County High School. I love to play volleyball and learn new things. Archives |
 RSS Feed
